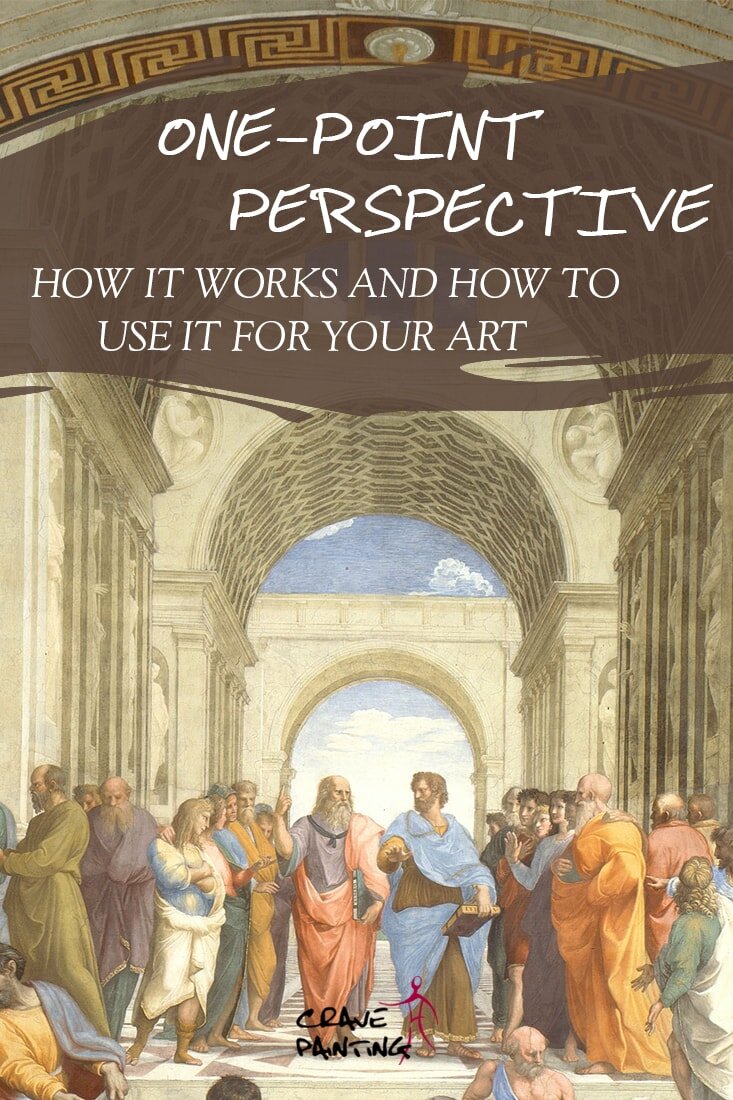
One-point perspective: How it works and how to use it for your Art
Understanding one-point perspective, vanishing points and convergence lines is a handy skill for any artist and quite crucial to learn advanced perspective topics later.
One-point perspective can be as dramatic as train tracks converging in the distance or it can be subtle, showing a slightly straight row of trees or group of people.
While perspective with all those unfamiliar terms and rules may appear difficult for beginners at first, dedicating a weekend or so to grasping the concept is not just a worthwhile endeavour but also hugely beneficial to your art.
What is perspective?
The Encyclopaedia Britannica defines perspective as the “method of graphically depicting three-dimensional objects and spatial relationships on a two-dimensional plane”.
Perspective is one of two ways (the other being shading) that enables us artists to make a subject with three dimensions (height, width and depth) appear the same on our flat drawing surface that has only two dimensions (height and width), to make it look realistic and natural.
Without the perspective box of tricks, we would not be able to turn a square into a box, for example. And we could not clarify the position of one this box in relation to another (i.e. next to, in front of, behind…).
Some of the tools of the trade, if you will, include overlapping, convergence lines and aerial perspective.
How perspective in art came about
Some of the very first drawings ever discovered actually use perspective. Of course nothing so sophisticated as vanishing points, but impressive nonetheless.
In some 30,000 year-old cave paintings in the Chauvet Cave in France you can see animals overlapping, making it seem as though some are further away than others.
Drawings on the walls of the Chauvet Cave in France
There is a fabulous documentary about this cave, discovered in 1994, containing some of the oldest cave paintings ever seen, which is really worth a watch.
The ancient Greeks had a far better grasp on perspective than cave dwellers and worked out some of the most advanced principles, such as convergence lines.
There are some very three-dimensional frescoes on the interior walls of ancient Greek and Roman villas, to entertain and delight the rich inhabitants.
Trompe l'œil fresco in the Villa Poppaea in Oplontis, southern Italy, ca. 90-25 BCE
But after the Roman Empire had fallen, during the medieval period, perspective wasn’t used much in the arts and the techniques might have been widely forgotten over time.
Luckily then along came the Renaissance artists around the 14th century who really, really liked perspective. With Filippo Brunelleschi leading the way all the rules were rediscovered and improved upon.
Important perspective terms
I’m not going to lie, it took me a while to fully grasp the principle with all its facets. Mainly because I read many different, often confusing definitions of the terms used to explain the topic.
Perspective drawing uses many different terms, like picture plane, eye level or horizon line.
Picture plane
When trying to understand perspective drawing we need to change our thinking from the 3-dimensional view of our surroundings to our 2-dimensional drawing surface.
For that purpose, it helps to imagine a flat plane between you and the subject you are drawing, like a sheet of glass from a window.
Eye level
Your eye level is the same as the horizon, where the sky meets the ground. What’s important to remember here is that eye level means the level/height of your (the artist’s) eyes, not necessarily where you’re looking (i.e. he might be looking up or down and not straight ahead).
Depending on your position the horizon is not always part of the drawing. E.g. if you’re standing on a very tall building and sketching what’s far below you the horizon would be at a point above the canvas, but still at your eye level.
Not necessarily part of one-point perspective but a super cool thing to note about eye level: if you are drawing people of approximately the same height as you their heads will all fall on the horizon (yours and their eye level), even if some are further away than others.
If you were sitting down your eye level might be at the waist of the people you are drawing, so their waists will all be on the horizon.
When sketching people of the same height their heads will align on the horizon (yours and their eye level). When you’re sitting down their waists might be on the horizon (your eye level, but not theirs).
I realise that this might sound a little complicated at first, but keep going. Sometimes it just takes a little while to sink in and it’ll all make perfect sense eventually.
Convergence lines
Lines that are parallel to each other, such as the two rails of train tracks, will often appear to converge in a single vanishing point (VP) in the distance, from your point of view.
Using convergence lines in drawing is incredibly useful to determine the height of objects in a row that are nearer or further from your point of view, and to convey perspective.
Photograph of a landscape showing one-point perspective (Westport Road, Clifden, Ireland)
The same Irish landscape showing the convergence lines, vanishing point (VP) and horizon line
Vanishing Point (VP)
VPs are the exact spots where sets of convergence lines run together. They are often on the horizon (your eye level) but not always. For example, in the above picture, if the road was going downhill instead, the VP would be below the horizon, because you are standing on a hill, looking down.
Often the VPs are also points of interest in a piece of art.
What is one-point perspective
In one-point perspective only one dimension of a three dimensional subject seems to recede to VPs (one-point = one vanishing point). Often that’s the ‘lines’ that run in the direction you are looking at.
Imagine you are drawing a simple box. One-point perspective comes into play when you look straight at about the middle of one of the sides of it, rather than at an edge (two-point perspective) or steeply up/down (three-point).
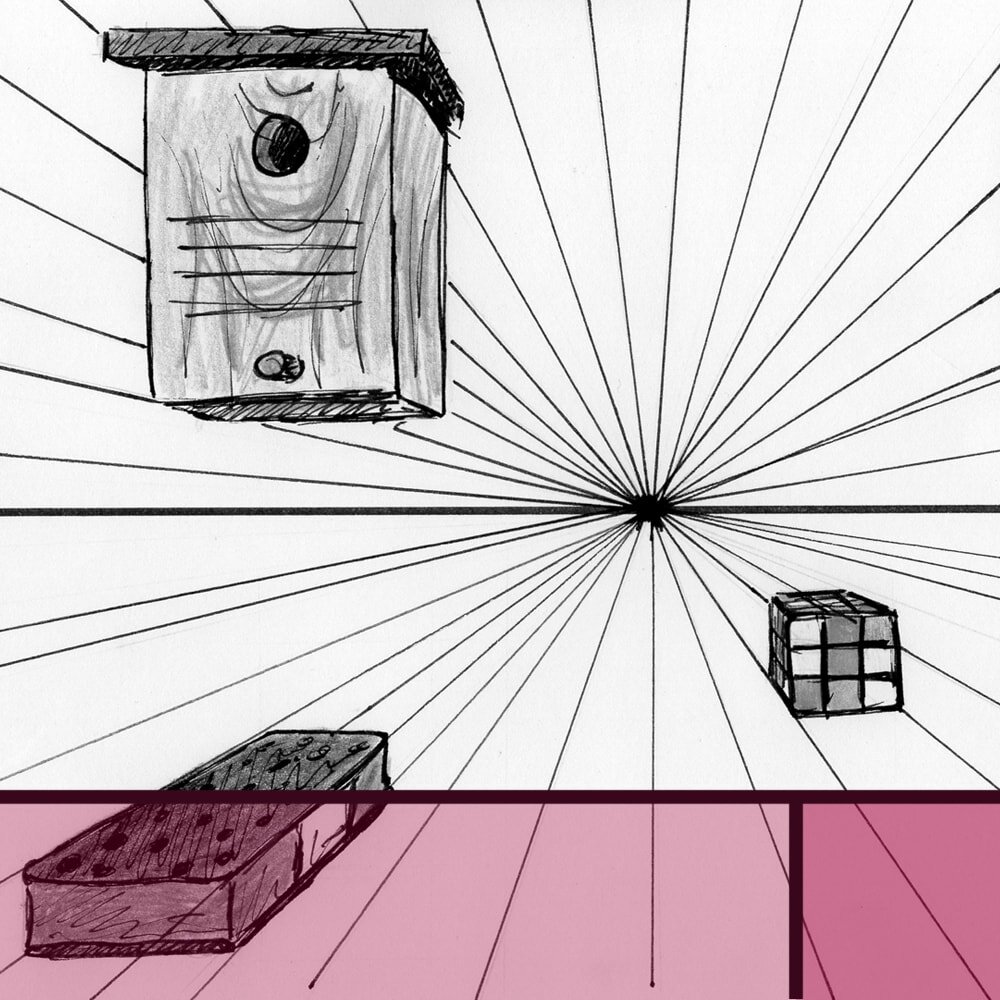
One-point perspective illustration of boxes above and below a horizon line with vanishing point and convergence lines.
The dimension that recedes is the depth of the box, so the ‘lines’ running in the direction you are looking at.
The other two dimensions, width and height, don’t recede. The two lines of the width stay parallel to each other (vertical in your drawing), so do the two lines of the height (horizontal in your drawing).
Important distinction: One thing about the above standard box example you’ll see in most books and videos has tripped me up for ages. Technically, only the boxes in the middle are true one-point perspective.
The others are actually two-point perspective and the top and bottom line of the small area visible on the right/left of the box should in fact also recede to another vanishing point towards the side.
However, the angle of the convergence is so slight in this case that we don’t bother with it and treat it as if it were one-point perspective.
If you’re feeling a bit lost now, don’t worry. You might have to read these paragraphs several times, that’s perfectly fine. As mentioned, it took me a while, too, to fully grasp this concept. But I promise, once you do it’s actually super simple.
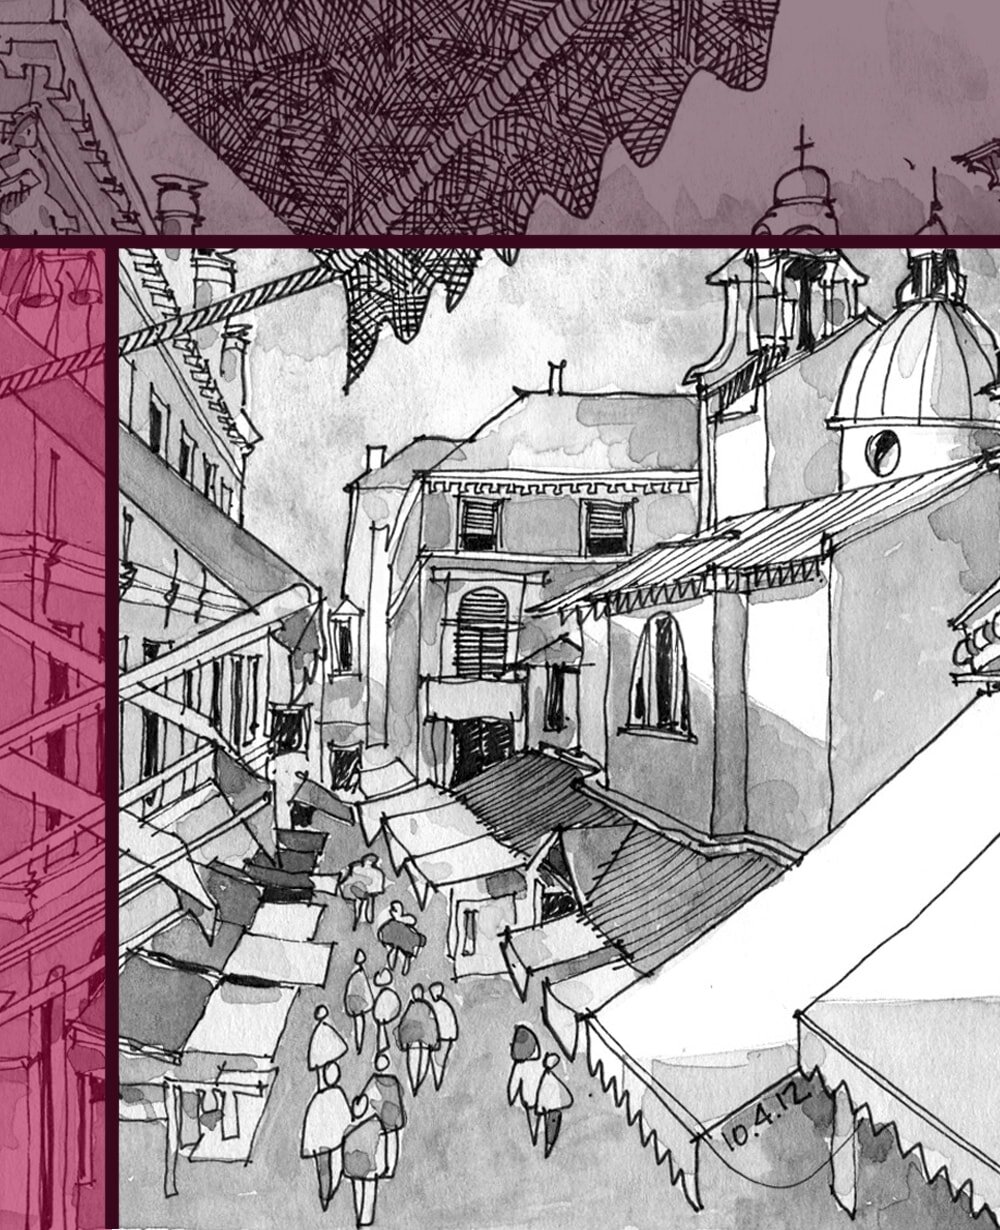
City street photograph showing one-point perspective with VP on the (not visible) horizon.
The VP does not always have to be right in the middle of the page. Having it intentionally a bit to the side can make a composition appear more interesting and less static and tunnel-like.
Some parts of this image are actually two-point perspective (e.g. the doorways). It’s rare that you only see one singular perspective view in a complex picture.
And the convergence lines don’t always have to run exactly in the direction you are looking at, either.
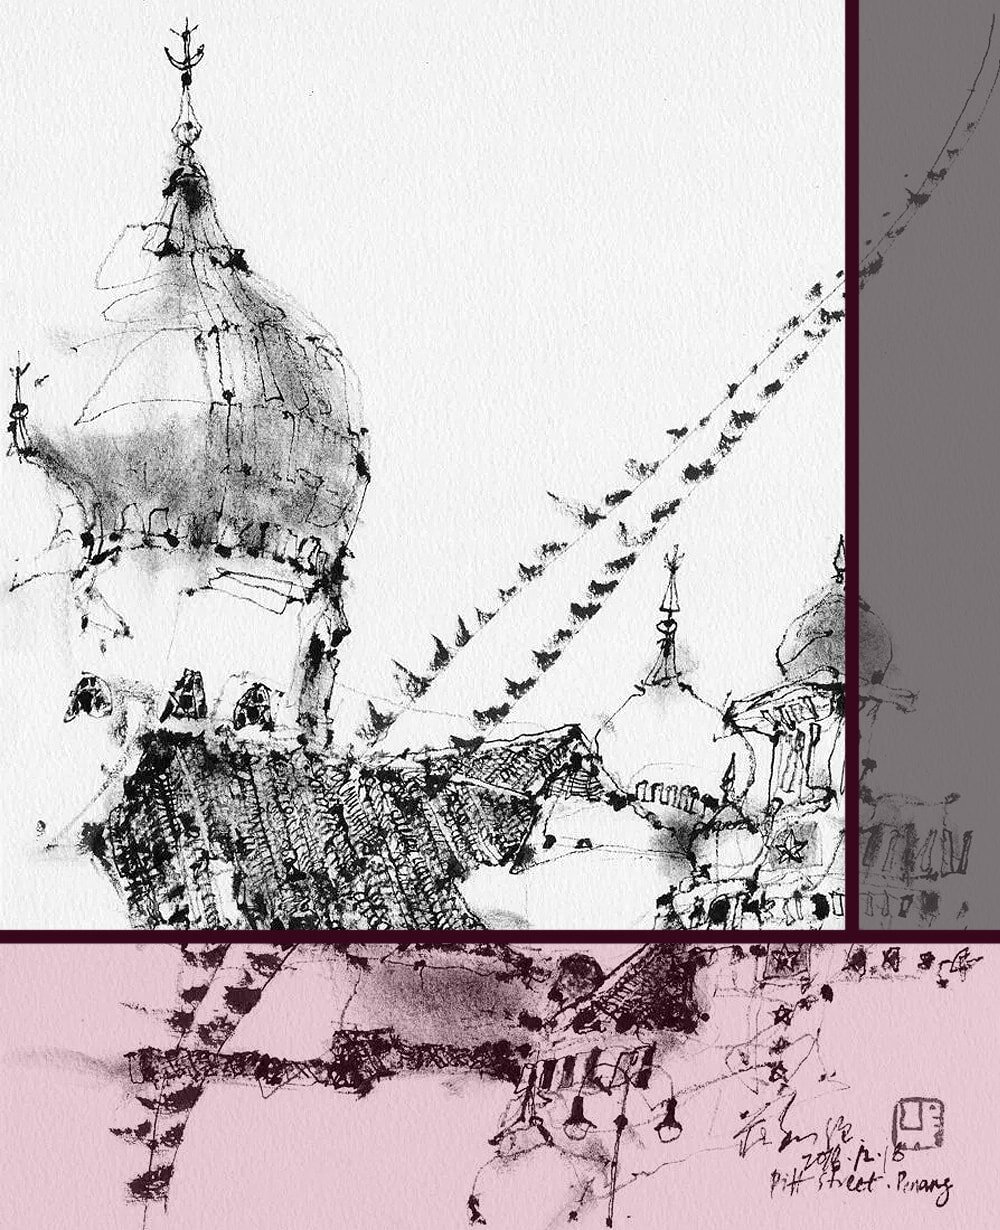
Prayer wheels in a row showing a lovely one-point perspective with the VP slightly off the picture.
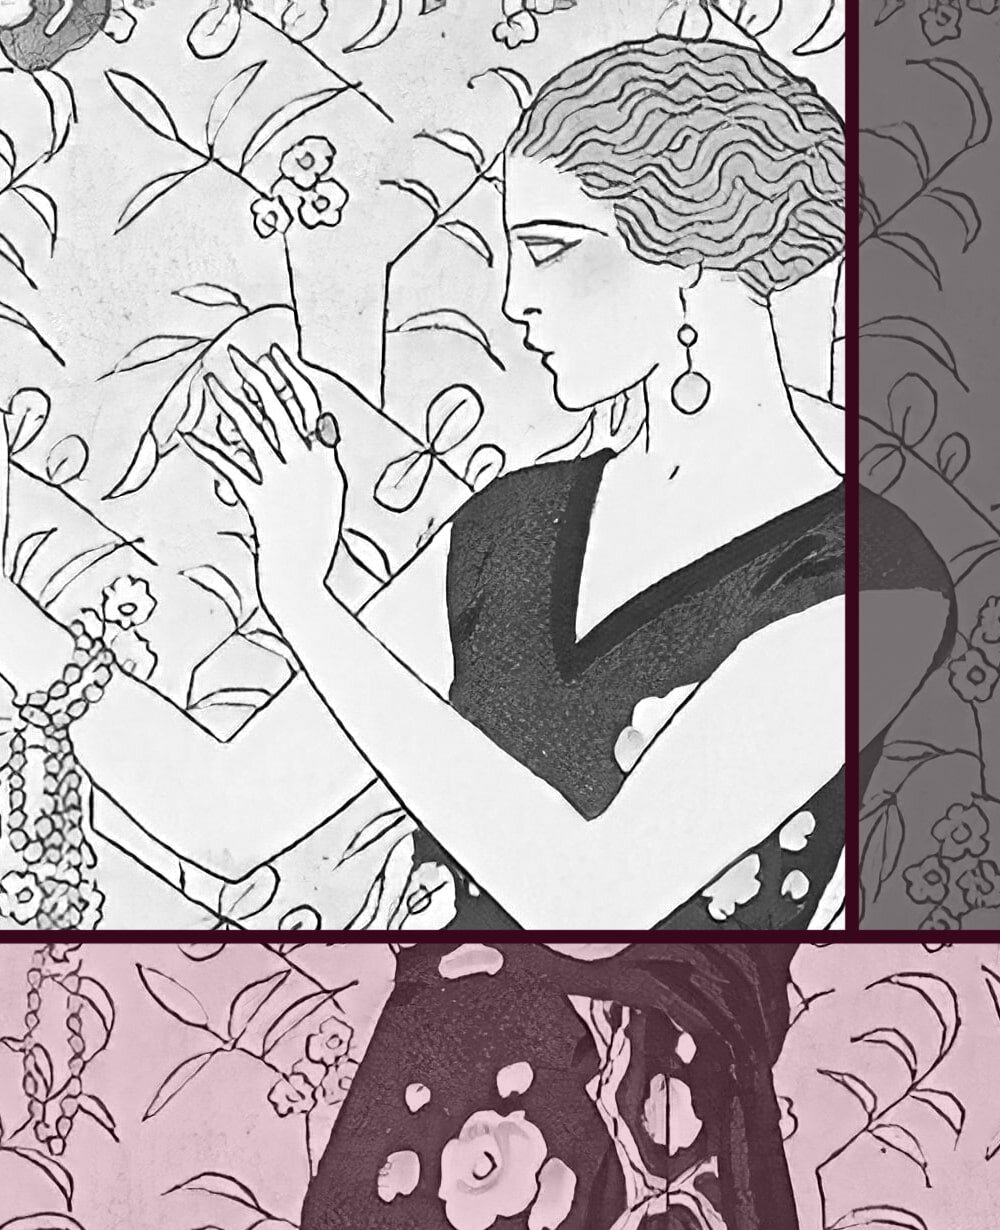
Women sitting on a wall in a row, showing one-point perspective with VP far off to the left.
Do keep in mind that perspective does not always involve objects or buildings. These lovely ladies are also showing a nice example of one-point perspective.
Note how the first and the last woman are roughly the same height in real life but the latter appears much smaller on the page.
Examples for one-point perspective in the arts
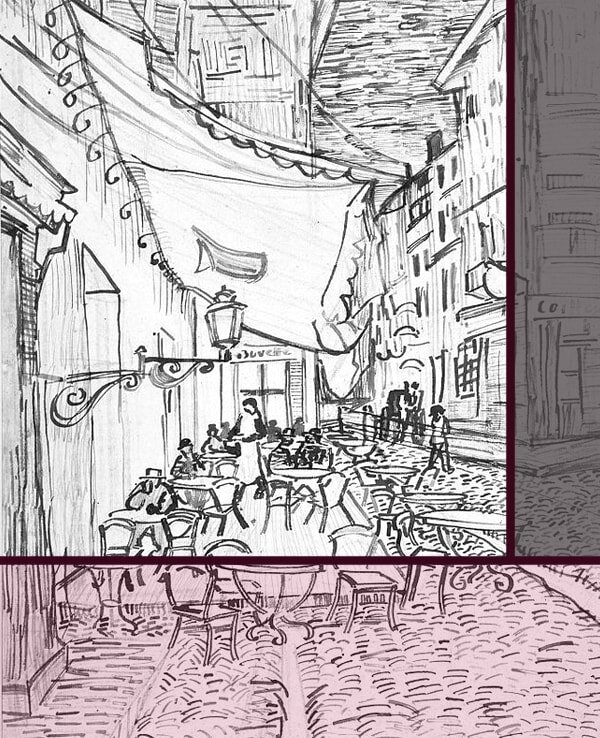
Café Terrace at Night (1888), Vincent van Gogh, as an example of one-point perspective.
One of the most popular examples of one-point perspective in art is van Gogh’s Café Terrace at Night.
The buildings with the café on the left were built parallel to the row of houses on the right, so there is one main vanishing point, at about the top of the window behind the waiter.
Interesting fact: even though this is a night painting van Gogh famously did not use any black in it, only very dark blue.
Raphael’s School of Athens showing some sophisticated one-point perspective.
Ah yes, Renaissance painters and their mastery of perspective. In this famous work painter Raphael (actually Raffaello Sanzio da Urbino) uses all sorts of trickery to enhance the three dimensional feel of it, including the pattern on the floor that also converges.
If you follow along the main convergence lines, you’ll get to a VP between the two gentlemen that take centre stage (Plato on the left and Aristotle on the right). Interestingly the VP is not on any point of interest. It is below the outstretched hand of Aristotle, not on it.
Note that other elements, such as the two pillars on the right and left edges are showing two-point perspective.
Night fantasy by Leonid Afremov showing one-point perspective par excellence.
This Leonid Afremov painting shows a splendid use of one-point perspective, with very little in the way of the convergence lines, so it’s easy to follow them to the light blue area in the distance where the VP is located.
With so few elements the work could easily be a little dull and obvious, were it not for the breathtaking use of colour and reflections.
How to draw with one-point perspective
One-point perspective is of course the entry point to any other, more difficult perspective, so that’s why we started with it.
While understanding all the principles in depth can take a little while, once you do it’s actually quite simple to draw it, on location or from imagination.
1. It’s always good to do a quick thumbnail sketch first. This will help you to work out a pleasing composition and you can find the rough location of the convergence lines, VP and horizon beforehand.
2. In the actual work you’ll want to start off with the horizon. Note that we have a tendency to set it too high, so do be mindful of where it would actually be, if it is not visible. Next, you can draw the most prominent convergence lines and the VP.
Since not all of these ‘landmarks’ should be visible in the finished work you’ll want to use very thin lines you can erase later.
3. Add the main elements of the drawing, the big shapes. The convergence lines and VP will help you to place them correctly.
4. Once you’re satisfied that the general perspective is correct you can go about adding detail and making it your next masterpiece.


Did you enjoy this article or feel like you have anything else to add? Feel free to leave me a comment below!
If you like this post, please share it, so others may like it too!