How to Draw Rocks and Mountains in a quick Landscape Sketch
Mountains, rocks and stones aren't easy to draw for anyone. Their irregular shapes and complicated shadows pose a challenge for beginners as well as pros. But one that we'll tackle today.
These simple tricks and exercises will help you find the right technique and with a bit of perseverance those rocks won't be intimidating any longer.
The right mindset
In all likelihood you have clicked on this article because you've had some trouble drawing rocky structures in the past, right? Believe me, I’ve been there.
The trick to overcoming this blockage (see what I did there?) is to lower the bar for the time being. And I mean all the way down.
It's a lot more fun to excel at something simple than to fail at something difficult.
If you start with the simplest possible way of drawing rocks and master that, you can move on to a difficulty one level above it, and so on.
It'll take a while to get where you might want to be, but it'll be a lot less frustrating. It's more fun to excel at something simple than to fail at something difficult, after all.
Understanding rock structure
Rocks are solid components of most landscapes. Just for a bit of background knowledge, broadly speaking there are three major types of rock.
Igneous rocks, formed from cooled magma, metamorphic rocks, which are pre-existing rocks changed by pressure and heat, and sedimentary rocks, formed by the accumulating of layers of sediments (particles of other rocks, plants or animals) over time.
Different types of rocks. Noatak National Preserve, Alaska
What's interesting for us as artists is that even within these groups rocks come in different shapes, sizes and textures. Some are very coarse, others can be layered, smooth or even glassy. They can be solid or porous, very hard or a super crumbly.
There are rocks that will break at random parts, into uneven pieces, while others have an internal ‘cleavage’ that creates clear paths where pieces break off, leaving smooth, clearly defined edges.
Rocks come in many different shapes, sizes, colours and textures. Your sketches should take these characteristics into account.
Mountains and equal terrain tend to have a sharp, coarse look to them, whereas river pebbles are often rounded, due to the continuous movement by the flowing water.
Colours can also be vastly different, even within parts of the same rock formation. We often think of them as mostly grey or brown, but there are thousands of shades between these extremes and many others a lot more colourful.
The rocks truly deserve to take centre stage in this pencil sketch at Whitesands Bay in Wales by Laura Frankstone. What an unrestrained and fun composition.
As an artist you don't need to know the name, formation process or chemical composition of what you're drawing. But you should develop an eye for different types of rock and their defining characteristics. It will make your drawings a lot richer.
One of the most important things for you to realise is that as complicated as some rocks may look, they all consist of very simple, underlying geometric shapes. Once you learn to see these it’ll be a lot easier for you to draw them convincingly.
Try to enjoy drawing rocks with all their special textures, rather than being intimidated by it. They can be a lot of fun once you relax into it and stop aiming for perfection.
Different Ways to Draw Rocks
There are many approaches to drawing rocks and mountains, from abstract to photorealistic, and everything in between.
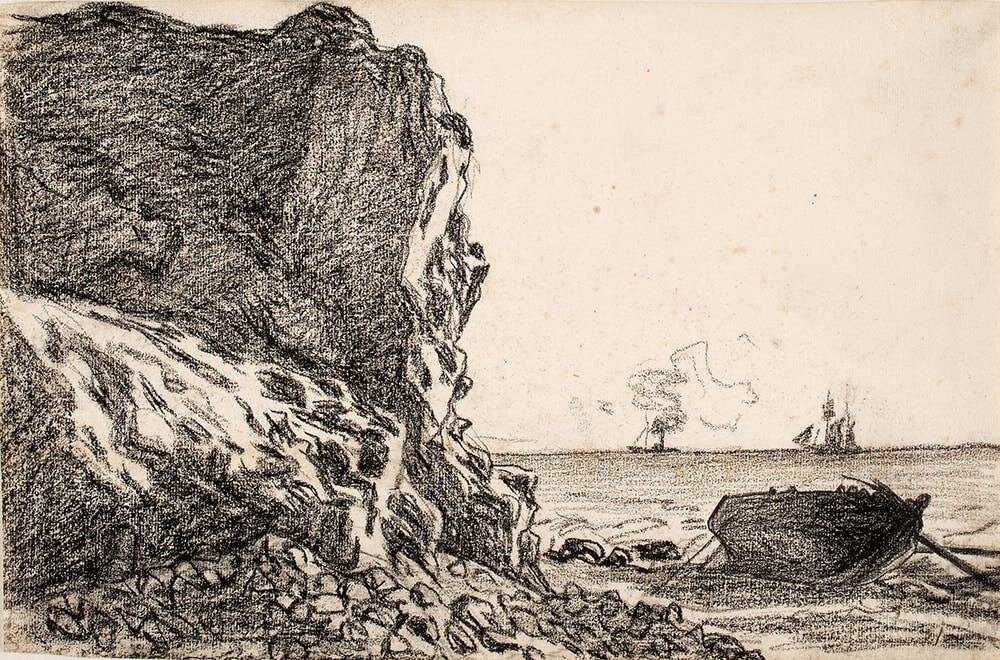
Below you can see two extremes. The first sketch is very rough, but as you see, even though there is no shading or detail you can easily see the mountain range.
The second drawing on the other hand is very realistic and would have taken quite a while.
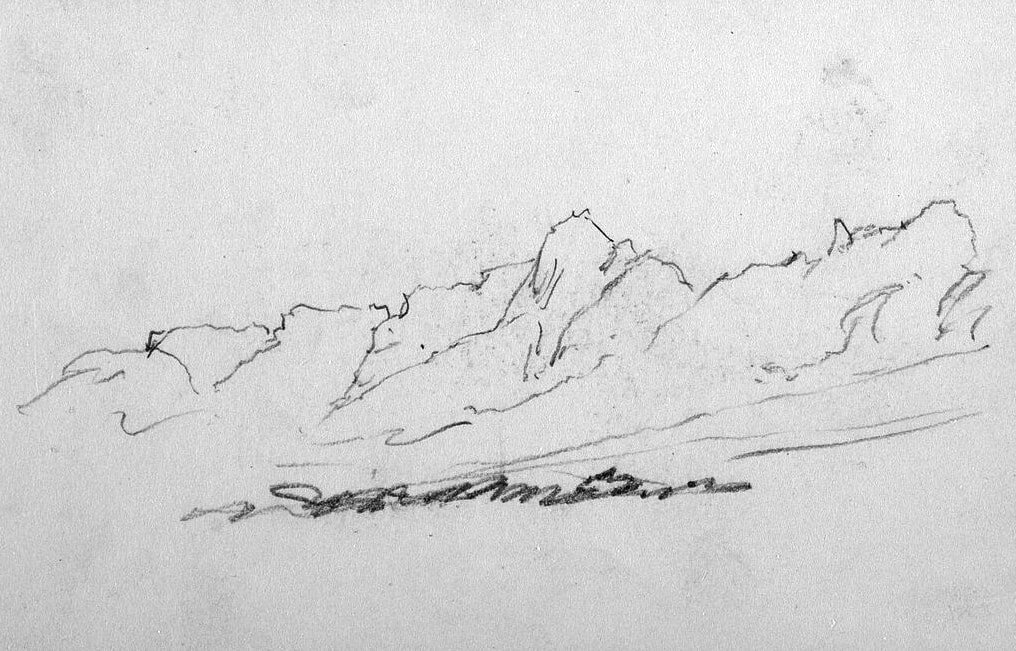

From these examples we can learn that it takes a lot less effort than you might think to draw recognisable rocks. Which is great for us because it means it’s entirely up to our personal preference (and how much time we have) how realistic we want it.
Rock drawings by famous artists
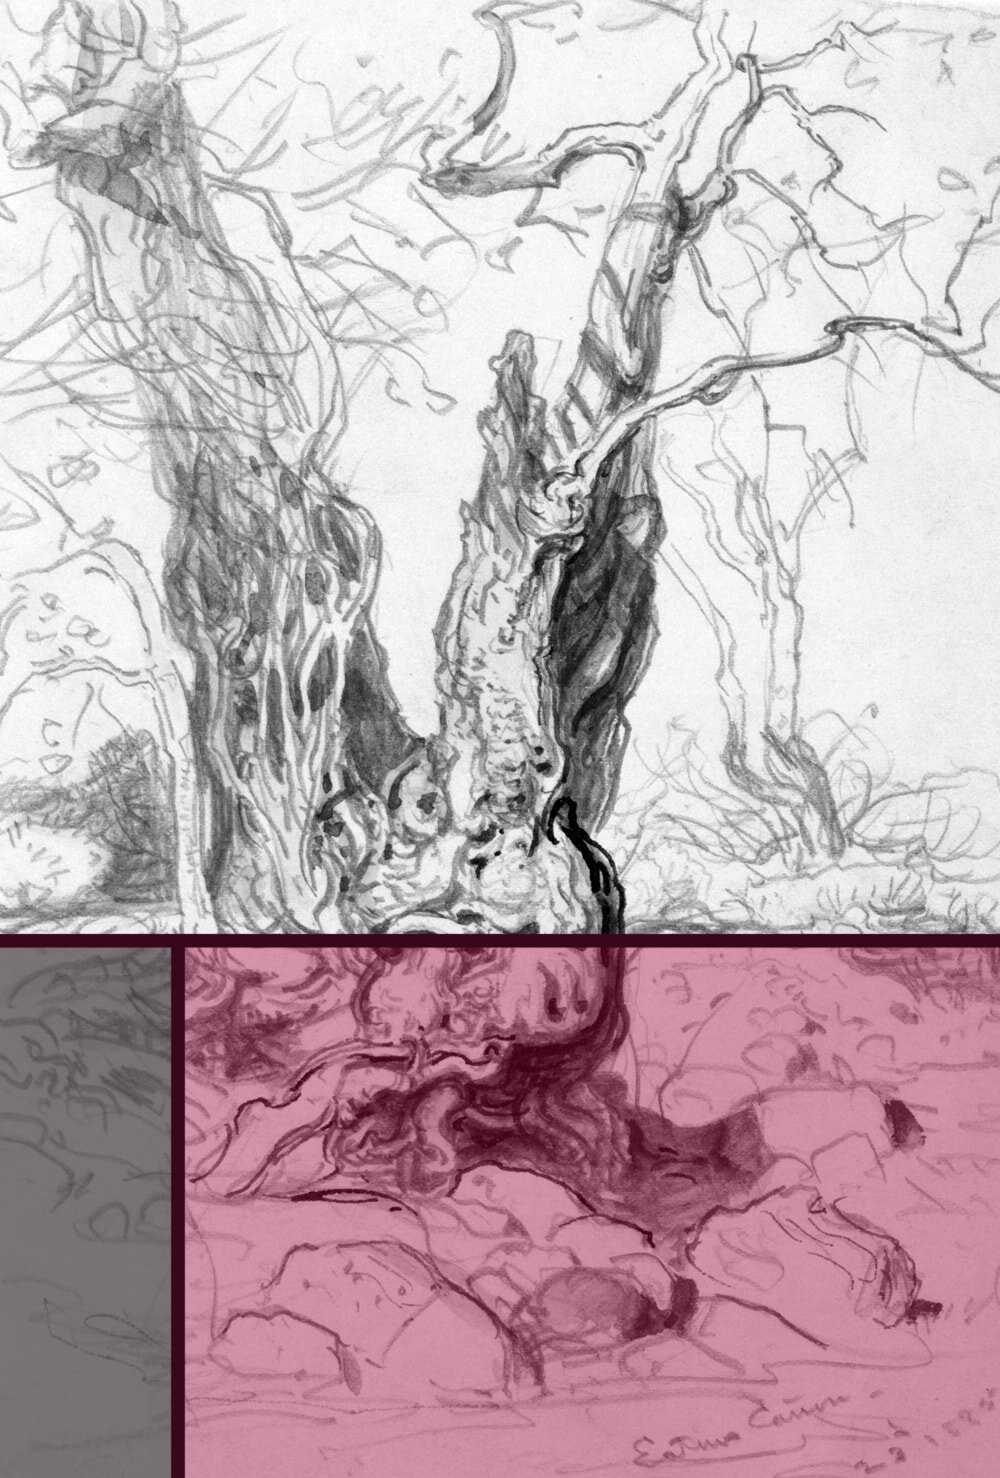
While it is true that rocks and mountains are not the most popular subject in the arts, I have found four lovely sketches for you from the major players in the arts, van Gogh, da Vinci, Rembrandt and Monet.


Note how very different their approaches and the level of detail and texture are. Yet they all reveal a lot of experience and look simply terrific.
Step 1 Get to know the rocks around you
The easiest way to ease yourself into this admittedly somewhat tricky drawing topic is to go on a little walk outside and take notice of the different kinds of rocks you'll find in your area.
Don't take your sketchbook this time, it's just about observing. Depending on where you live you might see anything from huge mountains to beach boulders or simple footpath gravel.
What kind of colour or size ranges can you see? Don't be afraid to pick some up or get really close (as long as it's safe) and touch them. It's a lot easier to get to know the texture this way.
Are they rough, smooth, light or dark? Clean or dirty, close-by or far in the distance?
Step 2 Start with the outlines
For this exercise all you need to do is choose a few rocks, outside or from a collection at home, and draw their outline. Don't bother with any shading or detail, just the basic silhouettes will do.
You can however play around a bit with the composition, especially if you're drawing smaller rocks you can move around. See if you can stack them or create some overlapping (more on that below).
I find it easiest to start off with some rough shapes using very light lines and then refine them one by one.
Keep in mind that the outlines need not be entirely accurate, but they should show the rough shape of the rock and ideally hint at the texture, namely if it's smooth or rough with a regular or conspicuous shape.
Continue with this practice until you're used to it, then move on to the next exercise.
Step 3 Practice geometric shapes
Regularly drawing different geometric shapes is something that’s super useful for all kinds of subjects, from still life to architecture. For mountains and rocks, too, it is almost invaluable.
Ideally, you’ll do a short practice of different shapes every day, or before every sketching session. You could draw cubes, pyramids, prisms and many more.
My post about the 10 simple Warm-Up Exercises I do regularly will give you some pointers.
Knowing these shapes in and out, especially how the major shadows fall will come in handy during the next few steps.
By the way, if you have trouble drawing these shapes from memory you can start with copying them from images (math books are great for that) or you can build your own models with cardboard and tape.
Step 4 Learn to see the planes
This fun little exercise is probably one of the best things you can practice to help you see the underlying geometric shapes I talked about earlier.
You're going to need some pictures of rocks that you can draw on. You can easily find some in geology journals or garden magazines. Or you can use photographs you took yourself or just print some out that you found on the Internet.
Have a look at the rocks and try to find their major planes. These are the areas that have a specific angle, so they catch the light from one specific direction.
Even the most complicated rocks are made of basic planes with underlying geometric shapes.
They're not always straight or smooth, so it can take a while for you to start seeing them. Looking for the differences in shadow strength will help you with that, as they’ll receive different amounts of sunlight due to their angle.
Once you see the planes, take a prominent pen and mark them on the picture. Don’t be afraid to simplify and straighten the lines.
You can also add some shading to indicate which planes are directed towards the sun and which might be in the shade.
Step 5 Major planes and shadows
Now that you have learned to see planes in the rock formations around you it's time to put it into practice.
Start off by drawing the outlines of some rocks around you, just as you did in step 2. Then refine the shapes by adding the major planes. You can use some rough shading as well, if you like.
Remember that this doesn't need to be absolutely faithful to the original. You can change and simplify wherever you like. If you’re not entirely sure about a plane, just guess, don’t overthink it.
Now, the principle to create more complicated rock patterns with more planes is exactly the same as with the major ones.
The size and number of planes in any given rock simply depends on how detailed you want your drawing to be. Add them layer by layer, break up the major planes into smaller ones and those again, until you’re satisfied.
Step 6 Edges
For most rocks it's a good idea to give at least some visual indication as to their edges. These are basically just changes of planes, where one area meets another with a different angle.
Rocks often have some relatively sharp edges, perhaps where parts of them were knocked off by storm or falling debris. Those look great if you draw them with a dark, sharp line.
Other changes in angle are smoother and are best drawn with a lighter line, just shadow or even entirely left out.
Rock formation illustrating changes in planes. Smooth (white arrow), medium (grey arrow) and “sharp” (black arrow).
If you're unsure which approach to use for a specific edge it helps to carefully run your finger over it, or imagine you do.
Step 7 Adding detail
The final step to creating a unique sketch is to add some detail. As always, you want to draw that rock, not a rock.
Many rocks have cracks, from aeons of water freezing and thawing, or simply from falling off a mountainside. Those cracks can be a visually very striking feature and should definitely be included in your sketch.
Some boulders are just naturally picturesque. Look at this great specimen with cracks and plants growing in between. Even that red waymarker perfectly complements the green moss.
Now is also a good time to darken some areas to create a more pleasing contrast. Usually that’s the cracks, of course, the foot of the rocks and any area that receives little to no light.
Depending on your drawing style you could also play around with some texture. Find out what the rock feels like to the touch, if you can safely reach it.
If it's smooth you could try smudging, if it's super rough scribbling could work nicely. You don't need to add texture everywhere, some hints here and there are usually enough, the viewers brain will fill in the blanks.
In quick sketches leaving some things to the imagination is often part of a good composition.
More interesting details that will add that little something extra to your sketch are listed in the next section.
A quick word on composition
A simple rock or mountain can often look a little boring on its own. But a group of rocks, overlapping or even partially stacked, makes for a compelling scene.
Overlapping is a super simple perspective technique. For a more realistic and intriguing view it's almost always a good idea to find (or arrange) several rocks on a horizontal plane where some of them are slightly closer to you than others.
Adding other materials and textures is a great way to balance the composition. Grass, long or short, moss, lichen, soil or other plant debris, all of these can add interest to an otherwise singular picture.
A few simple compositional tricks can turn a singular view into a compelling masterpiece.
You'll also want to remember aerial perspective. It teaches us that objects further away appear smaller, more blurry and lighter/bluer, due to more particles in the air between us and the object. This knowledge can be used, again, to add that little something extra to a composition.
My article 5 great Exercises to learn Perspective Drawing the easy Way has an exercise to to help you practice overlapping and aerial perspective with rocks.
Mount Ellinor / Mount Washington 360° panorama photo by Gregg M. Erickson showing a fabulous depth due to aerial perspective and overlapping.
Now, because rocks come in all sizes, from pebbles to boulders to mountaintops, it can be helpful to add some visual aids for size comparison.
If you want your viewers to have an idea of the size of the rocks in your drawing you might want to put them in relation to other objects of a known size. That might be certain plants, like grass or trees, animals or people.
Finally, and most importantly, realise that rocks are amazing and fascinating and deserve to occasionally be the centre of a composition, rather than just accidentally lying around on the outskirts of a lake view you've been drawing.
If you keep practising, your rocks will look more interesting in each sketch and the better you get the more worthy subjects they'll become.
For more tips and tricks have a look at my other landscape-related articles.


Did you enjoy this article or feel like you have anything else to add? Feel free to leave me a comment below!
If you like this post, please share it, so others may like it too!